Many things have happened since my last update nearly 13 months ago… this post is somewhat of a review of that timespan and the projects I’ve done, it’ll be a big one.
Generating Sysex parameter control in Supercollider for the Wavestation A\D
I did end up finding a way to generate Sysex in Supercollider and sequence it in patterns. It’s been long enough now since I got this going, but you can find my code here. Many thanks to the folks on the SC Users List for all their help. This video shows a bit of it.
Arch Linux
After lots of trial and error with various Linux distros: Ubuntu, POP OS, and Fedora, and past experiences with Debian and Mint, I decided to go ‘deep’ and install Arch. I had some prior experience with it, but never made could set aside enough time to complete a working system. Arch Linux has a vast improvement on my workflow. I installed the i3 windowing manager and many other tools to get a working system that could easily run Supercollider, Reaper, an old version of Komplete, and allow me to connect my RME Fireface 800 and MIDI gear. It took a bit of time but everything is working great and its super fast! I have to give Mads Kjeldgaard a huge shout-out for all of his posts – he has extremely useful information on his website to assist with streamlining an Arch-based setup – in addition to other useful posts on Supercollider and developer environments for DIYing synth stuff. This video is me experimenting with VCV Rack on Arch, sending to a modular and Wavestation.
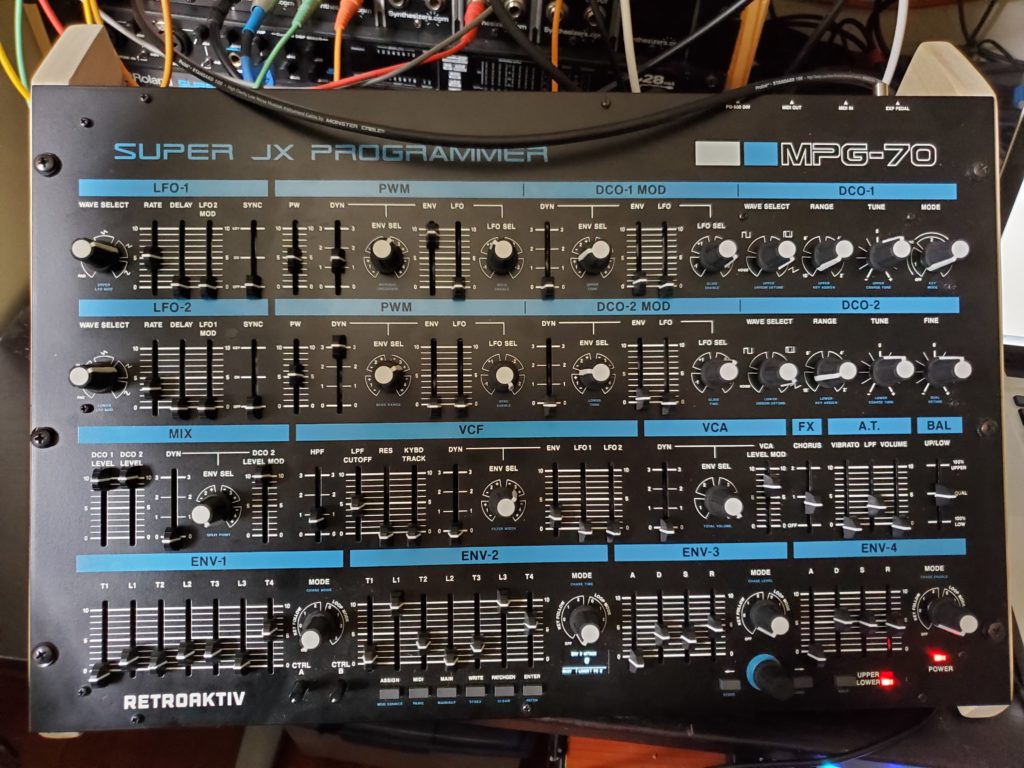
Retroaktiv MPG70
I bought an amazing controller/editor for my Roland MKS70. I’ve talked about it a bit in previous posts as a dream thing to add to complete that instrument setup, after having modded the Firmware, replaced the screen with an OLED, and added PWM capability and flash firmware capability. Now I have an extremely powerful 12-voice poly synth. The controller simplifies patch editing, has an interesting random patch capability, and most importantly, allows you to do stuff with physical controls like real time editing of sounds. Since that time Rob at Retroaktiv has been developing controllers for other old synths, with a promise of creating a big new firmware update that enables saving patches on the synth itself. I’ve been waiting on that for nearly a year, but when that’s finished I’m imagining it will be even more powerful.
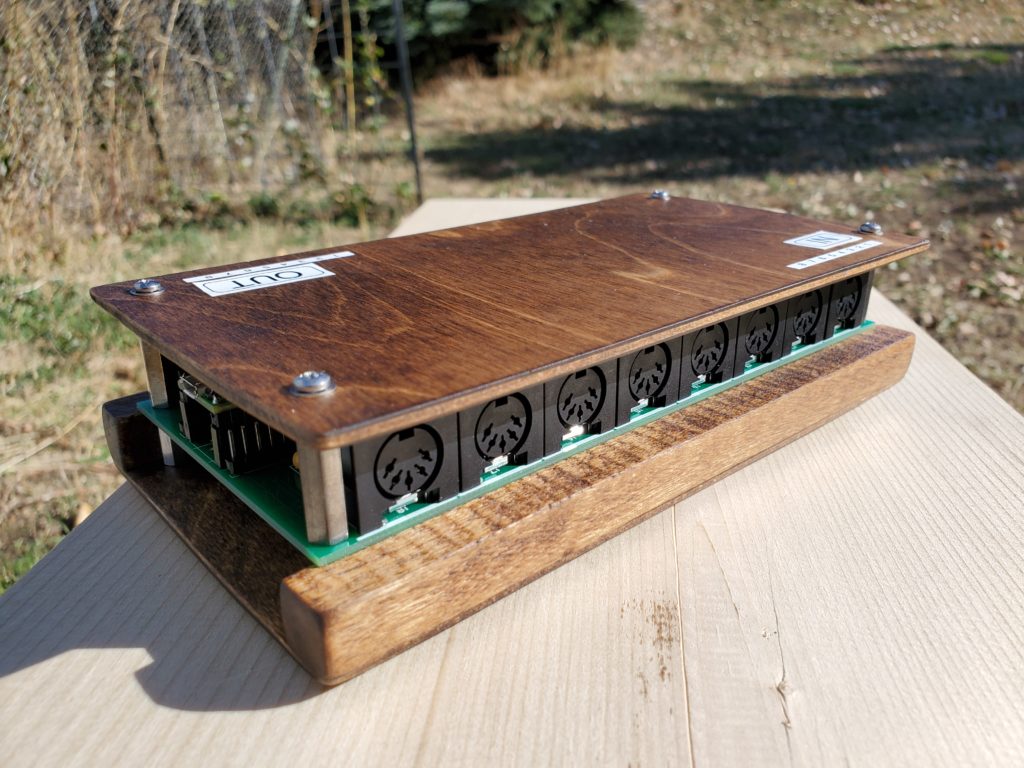
DIY 8-port MIDI interface
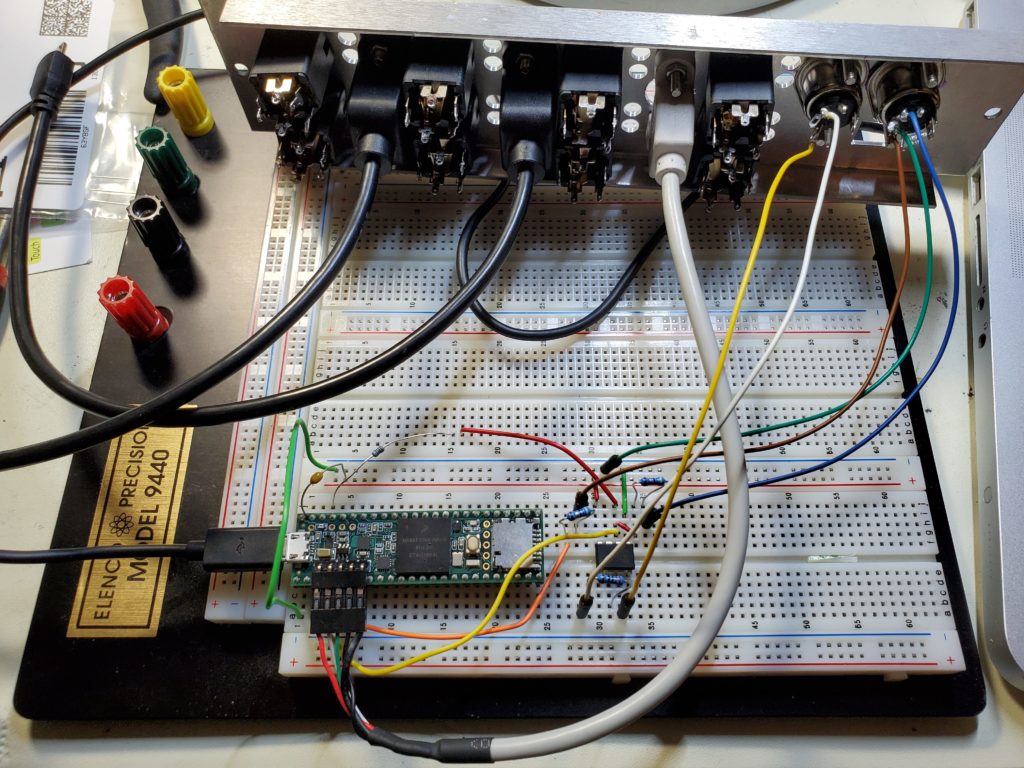
Teensy micro-controllers have been allowing me to do all kinds of stuff I’ve wanted to do for a long time. I have a MOTU MIDI Express XT but its annoying, doesn’t have MIDI host capability (MIDI over USB with or without a computer), and doesn’t play well with Linux. To complete my Linux system I needed solid, cross-platform MIDI interface. I had heard of MIDI hosts being somewhat easy to make using a Teensy and then found the Deft Audio PCBs and kits for sale here. It was a super easy build. I have a setup I’ve configured for my studio that forwards some ports to other ports, allowing a default setup. With a computer I can just use Jack for my routing. If I need to change the default setup – I edit an Arduino file that lives on the Teensy 4.1. The simplest housing I could figure out for my setup was to place it in Balsa Wood. Its attached to the side of one of my 8U racks in the studio.
H Modular
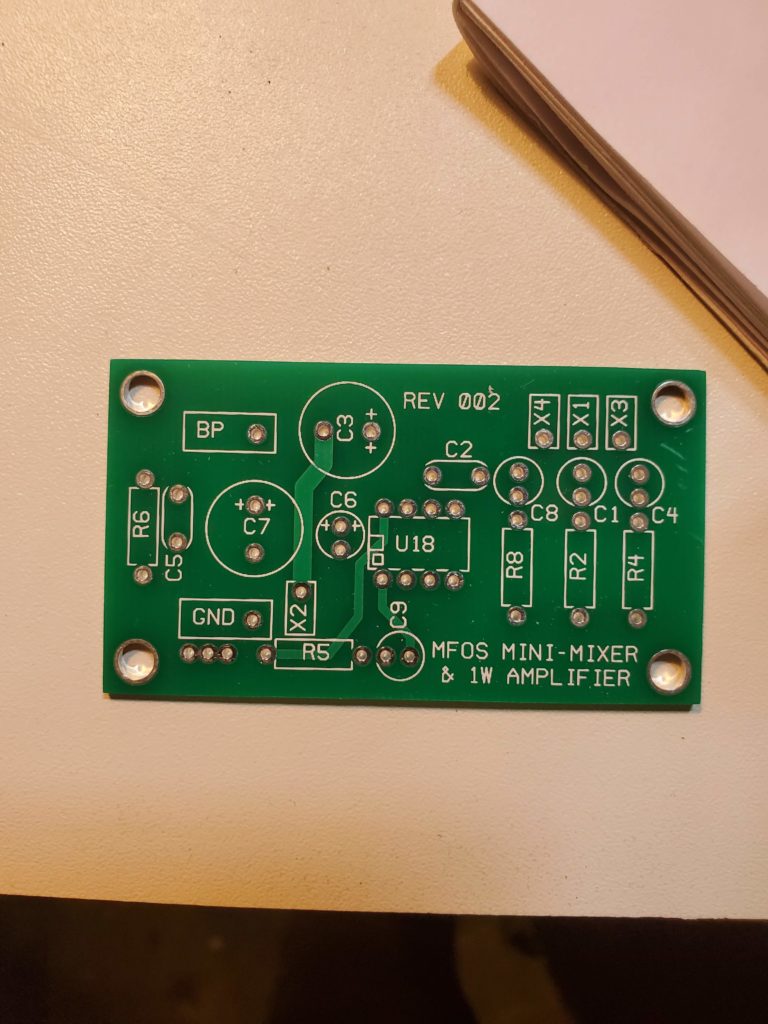
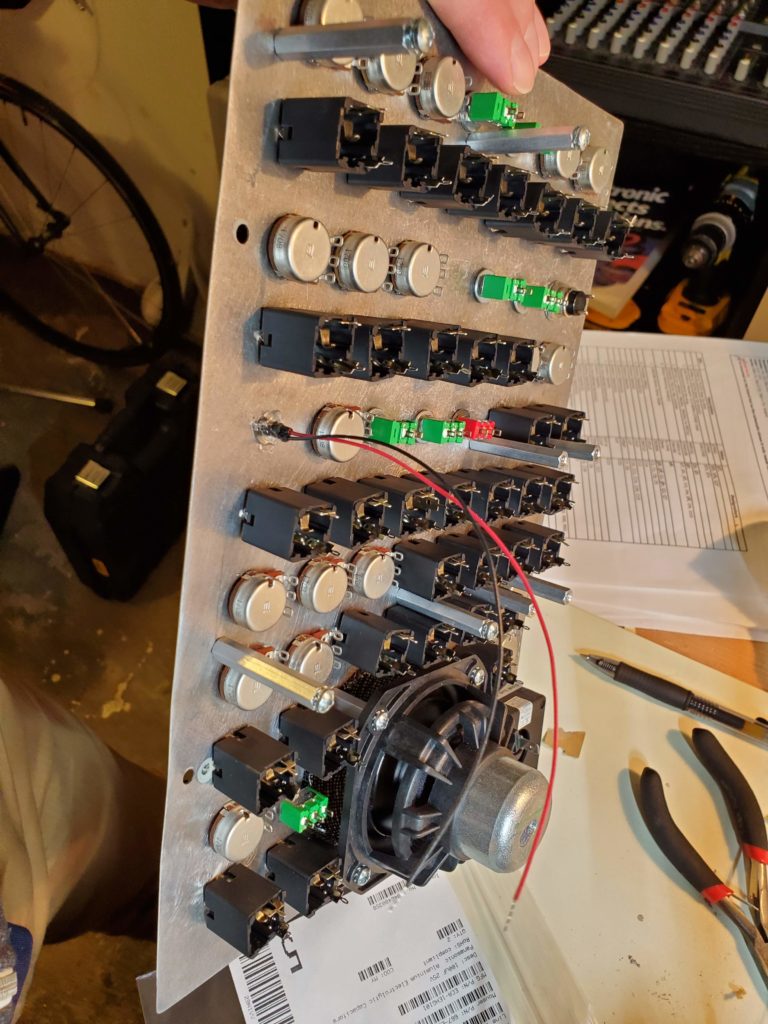
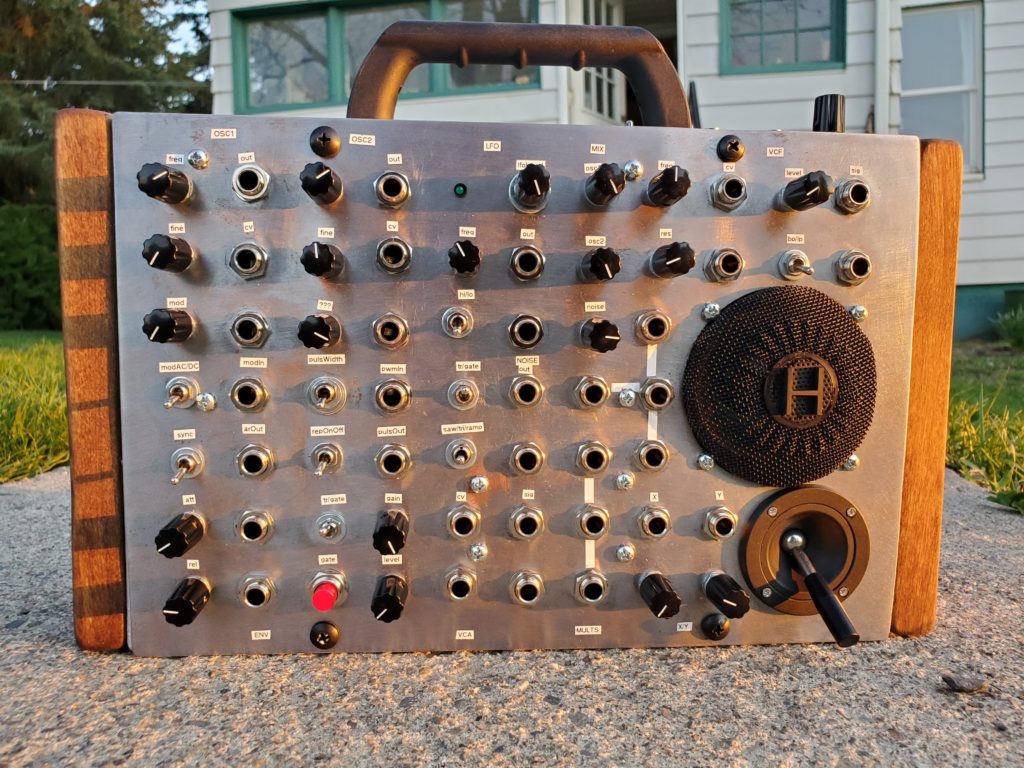
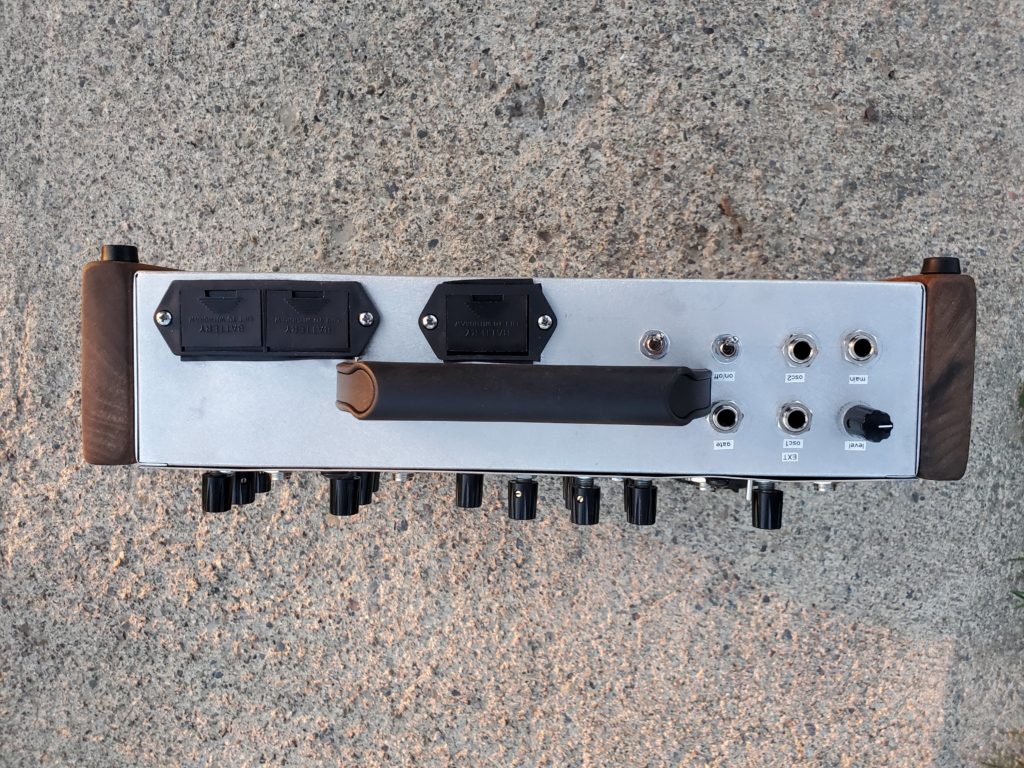
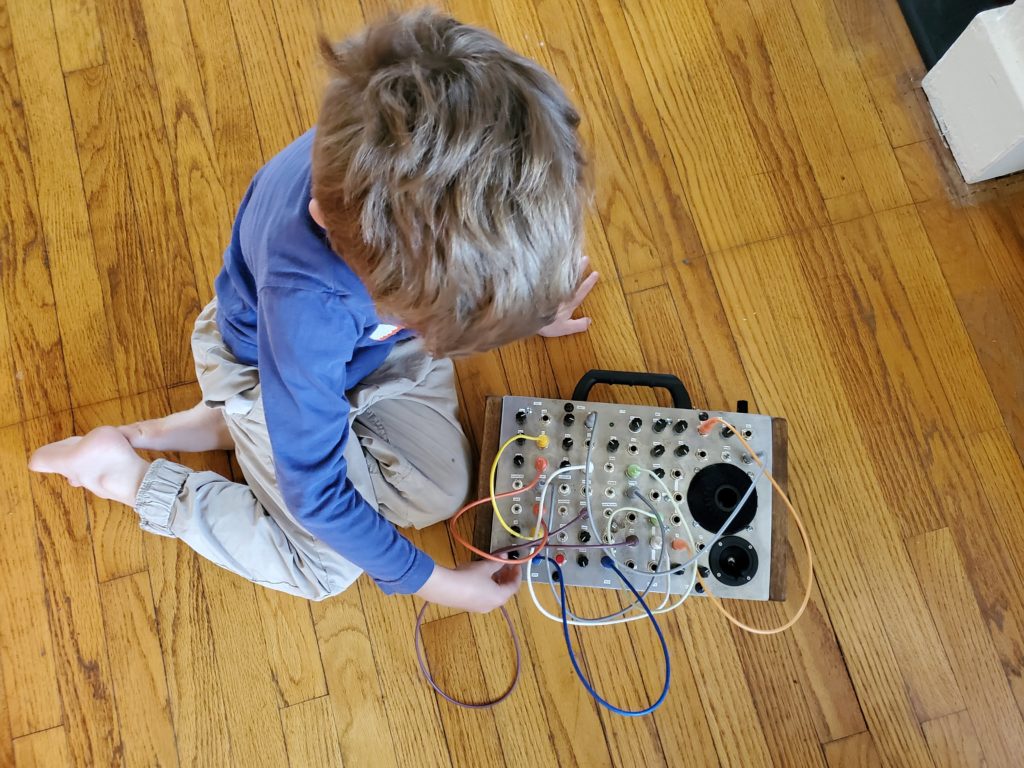
After getting my Linux computer going, I finished my son’s first synth, a Music From Outer Space (MFOS) Sound Lab Mini Synth, modded to be a battery powered modular with a speaker and a joystick. I had sourced the PCB in 2008 from Ray Wilson himself, and started populating it in 2018, then life happened, and I finally had a chance to get it going again in lock down. I placed it in a Bud enclosure, tried to conform to a 1″ serge inspired grid using a junked steel panel from some old computer equipment. I cut holes in the back of the enclosure for more jacks/switches/knobs, a couple battery compartments, and a handle. It probably too me a couple months to finish once I really was able to dedicate free time to it, but lots of sourcing stuff and waiting for delivery. I learned a lot about synth building – wiring and mounting to a panel, understanding schematics a bit better, wrapping my head around components, general panel layout considerations, and making wood side panels – Danish oil on cheap sanded wood can look amazing! Since building it I’ve found a few spots I need to fix or attend to: I want to redo the panel with a paperface design on aluminum, and use colored banana jacks to help designate in/outs. I also need to add additional circuitry to the joystick to get it right, there’s points in the range that overload so I think I need to do some TL072 magic. The same sort of thing is happening somewhere in the filter with an external input I added, so I may be adding something for both spots. And adding the banana jacks will require redoing panel wiring, so that’ll be a big project.


3x 5U/MU O_Cs
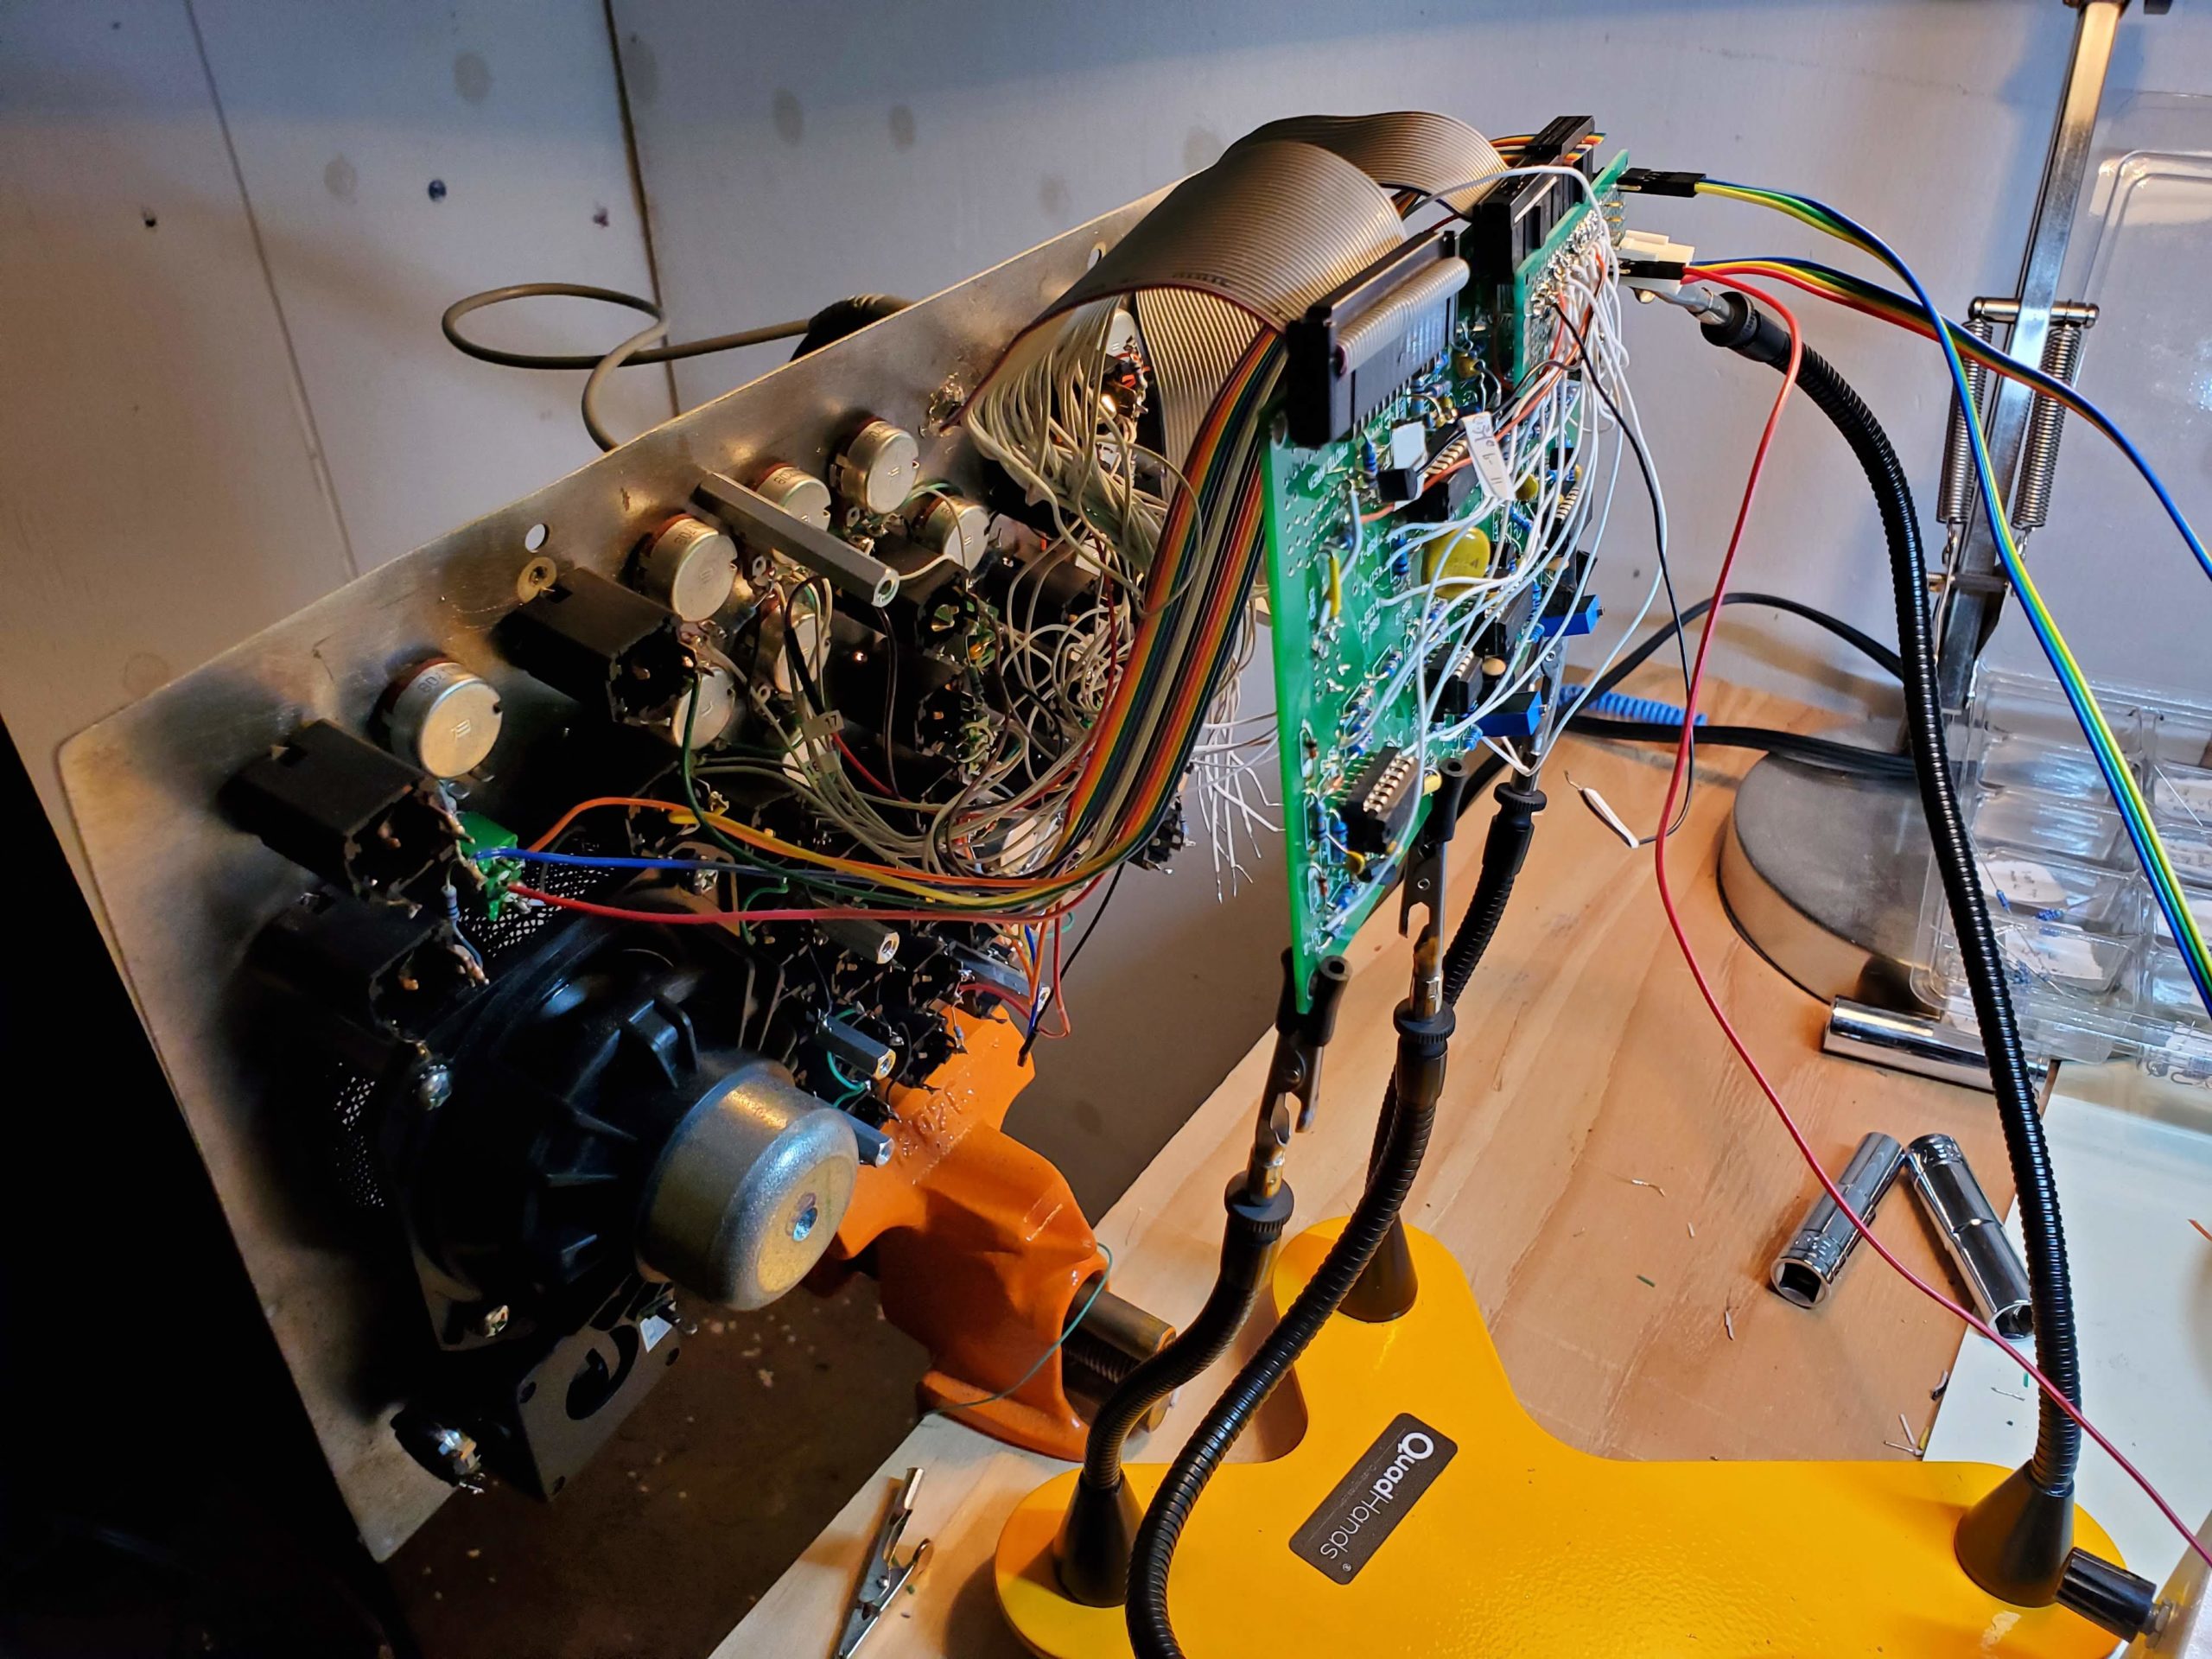
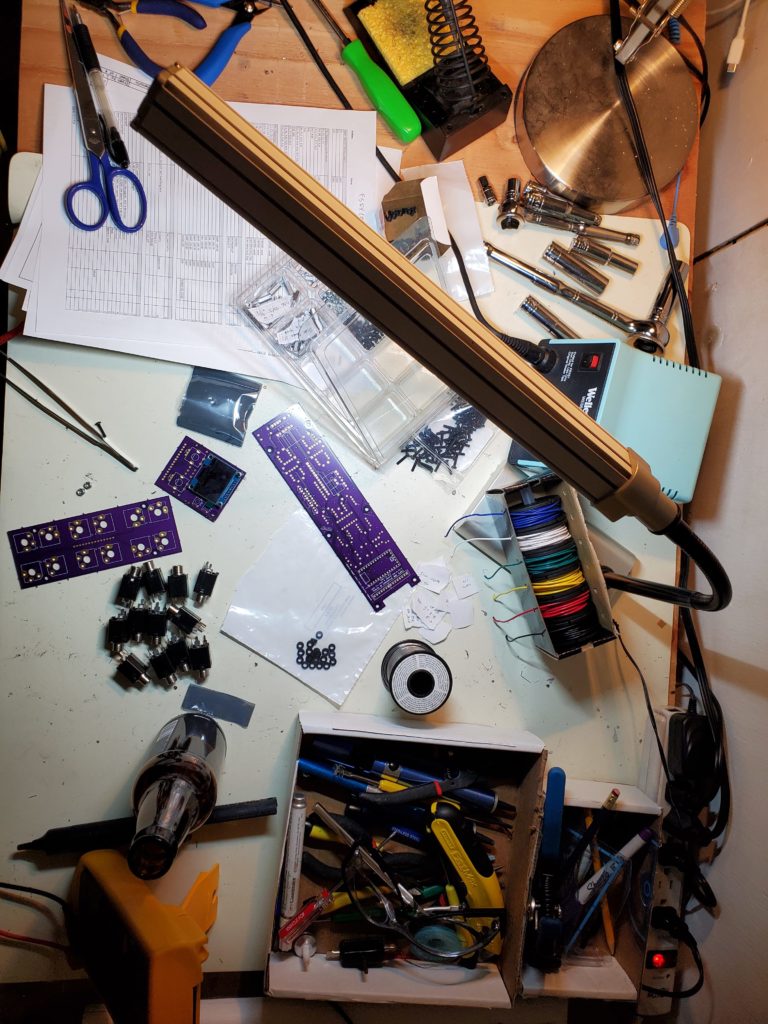
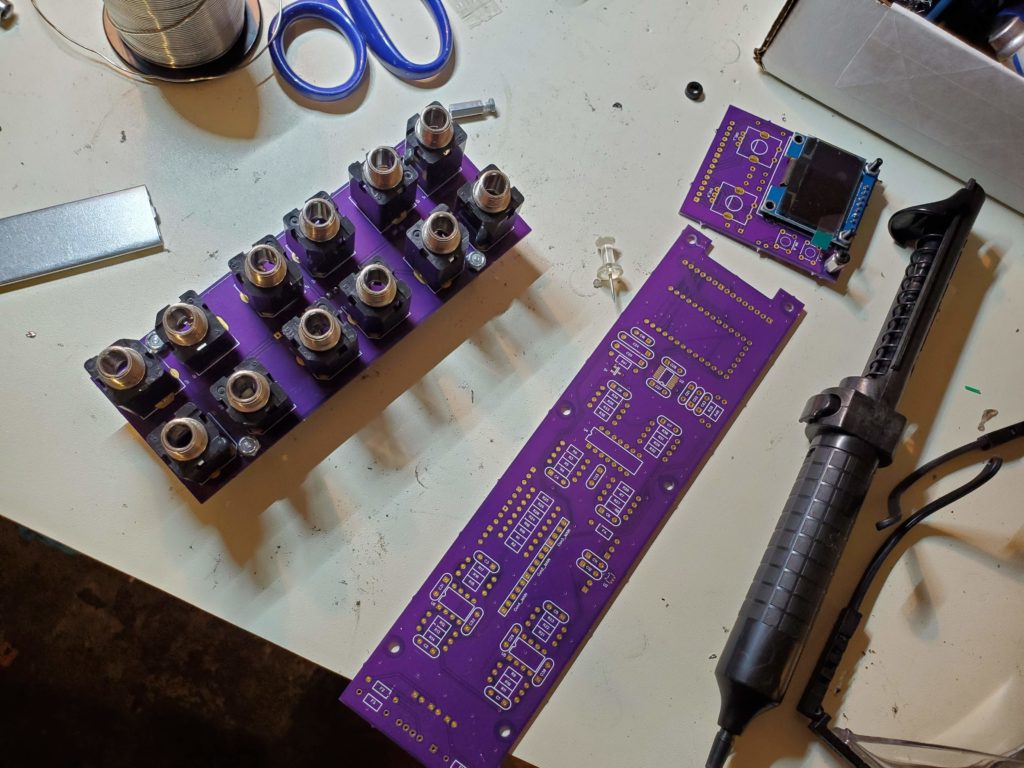
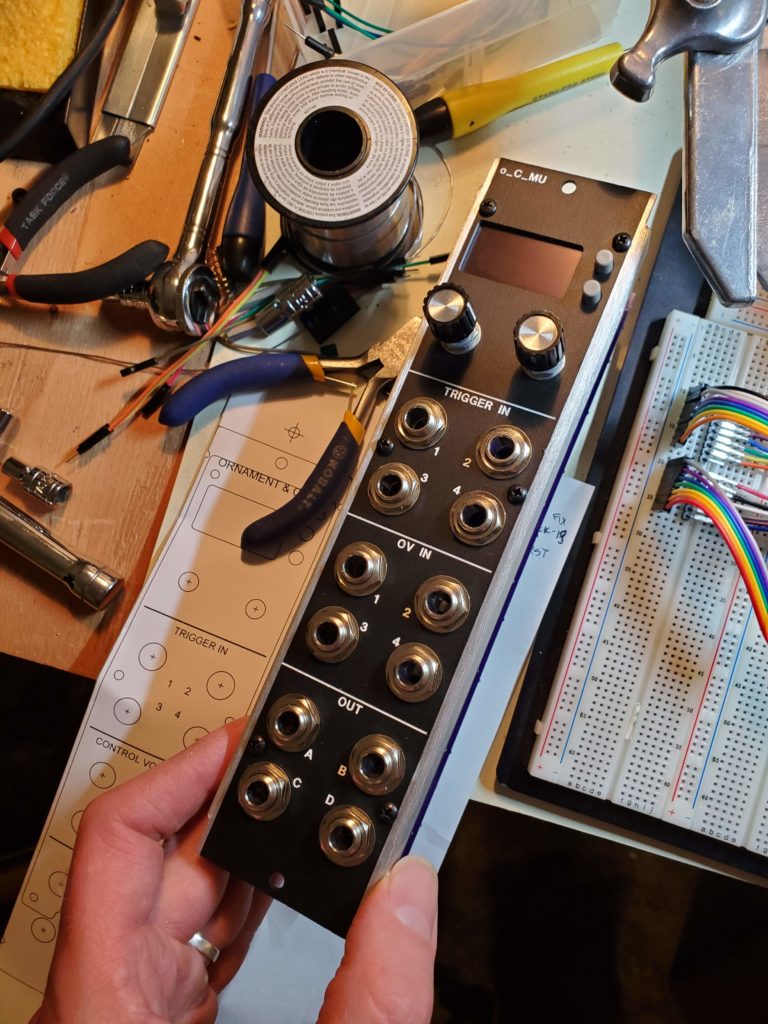
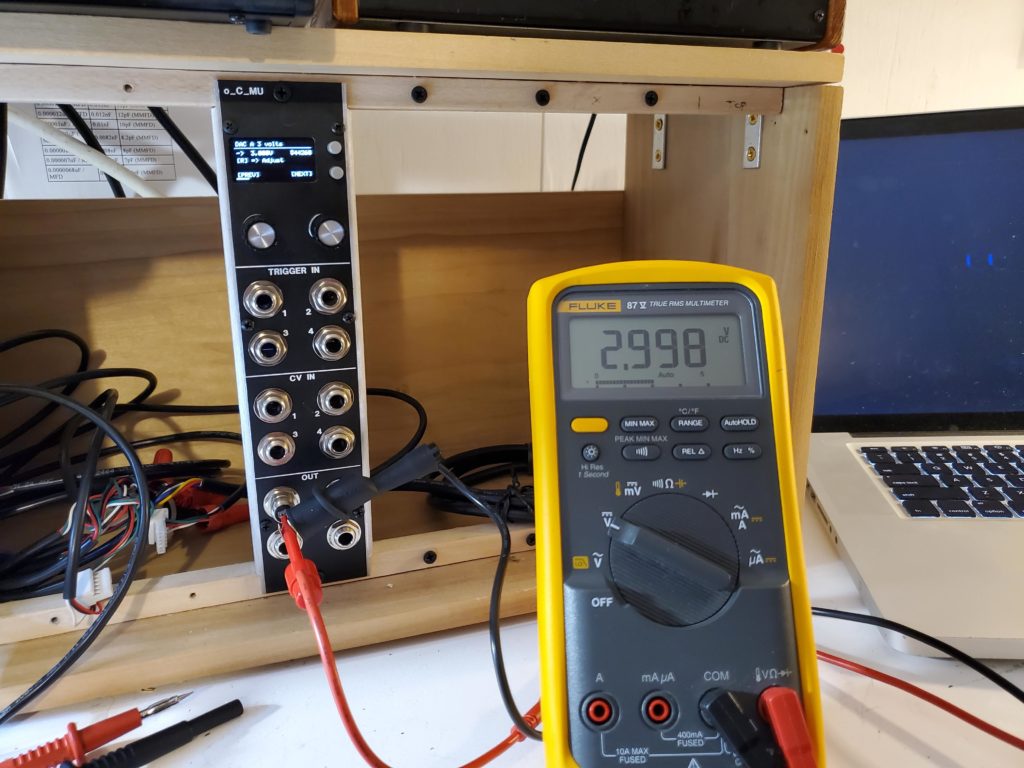
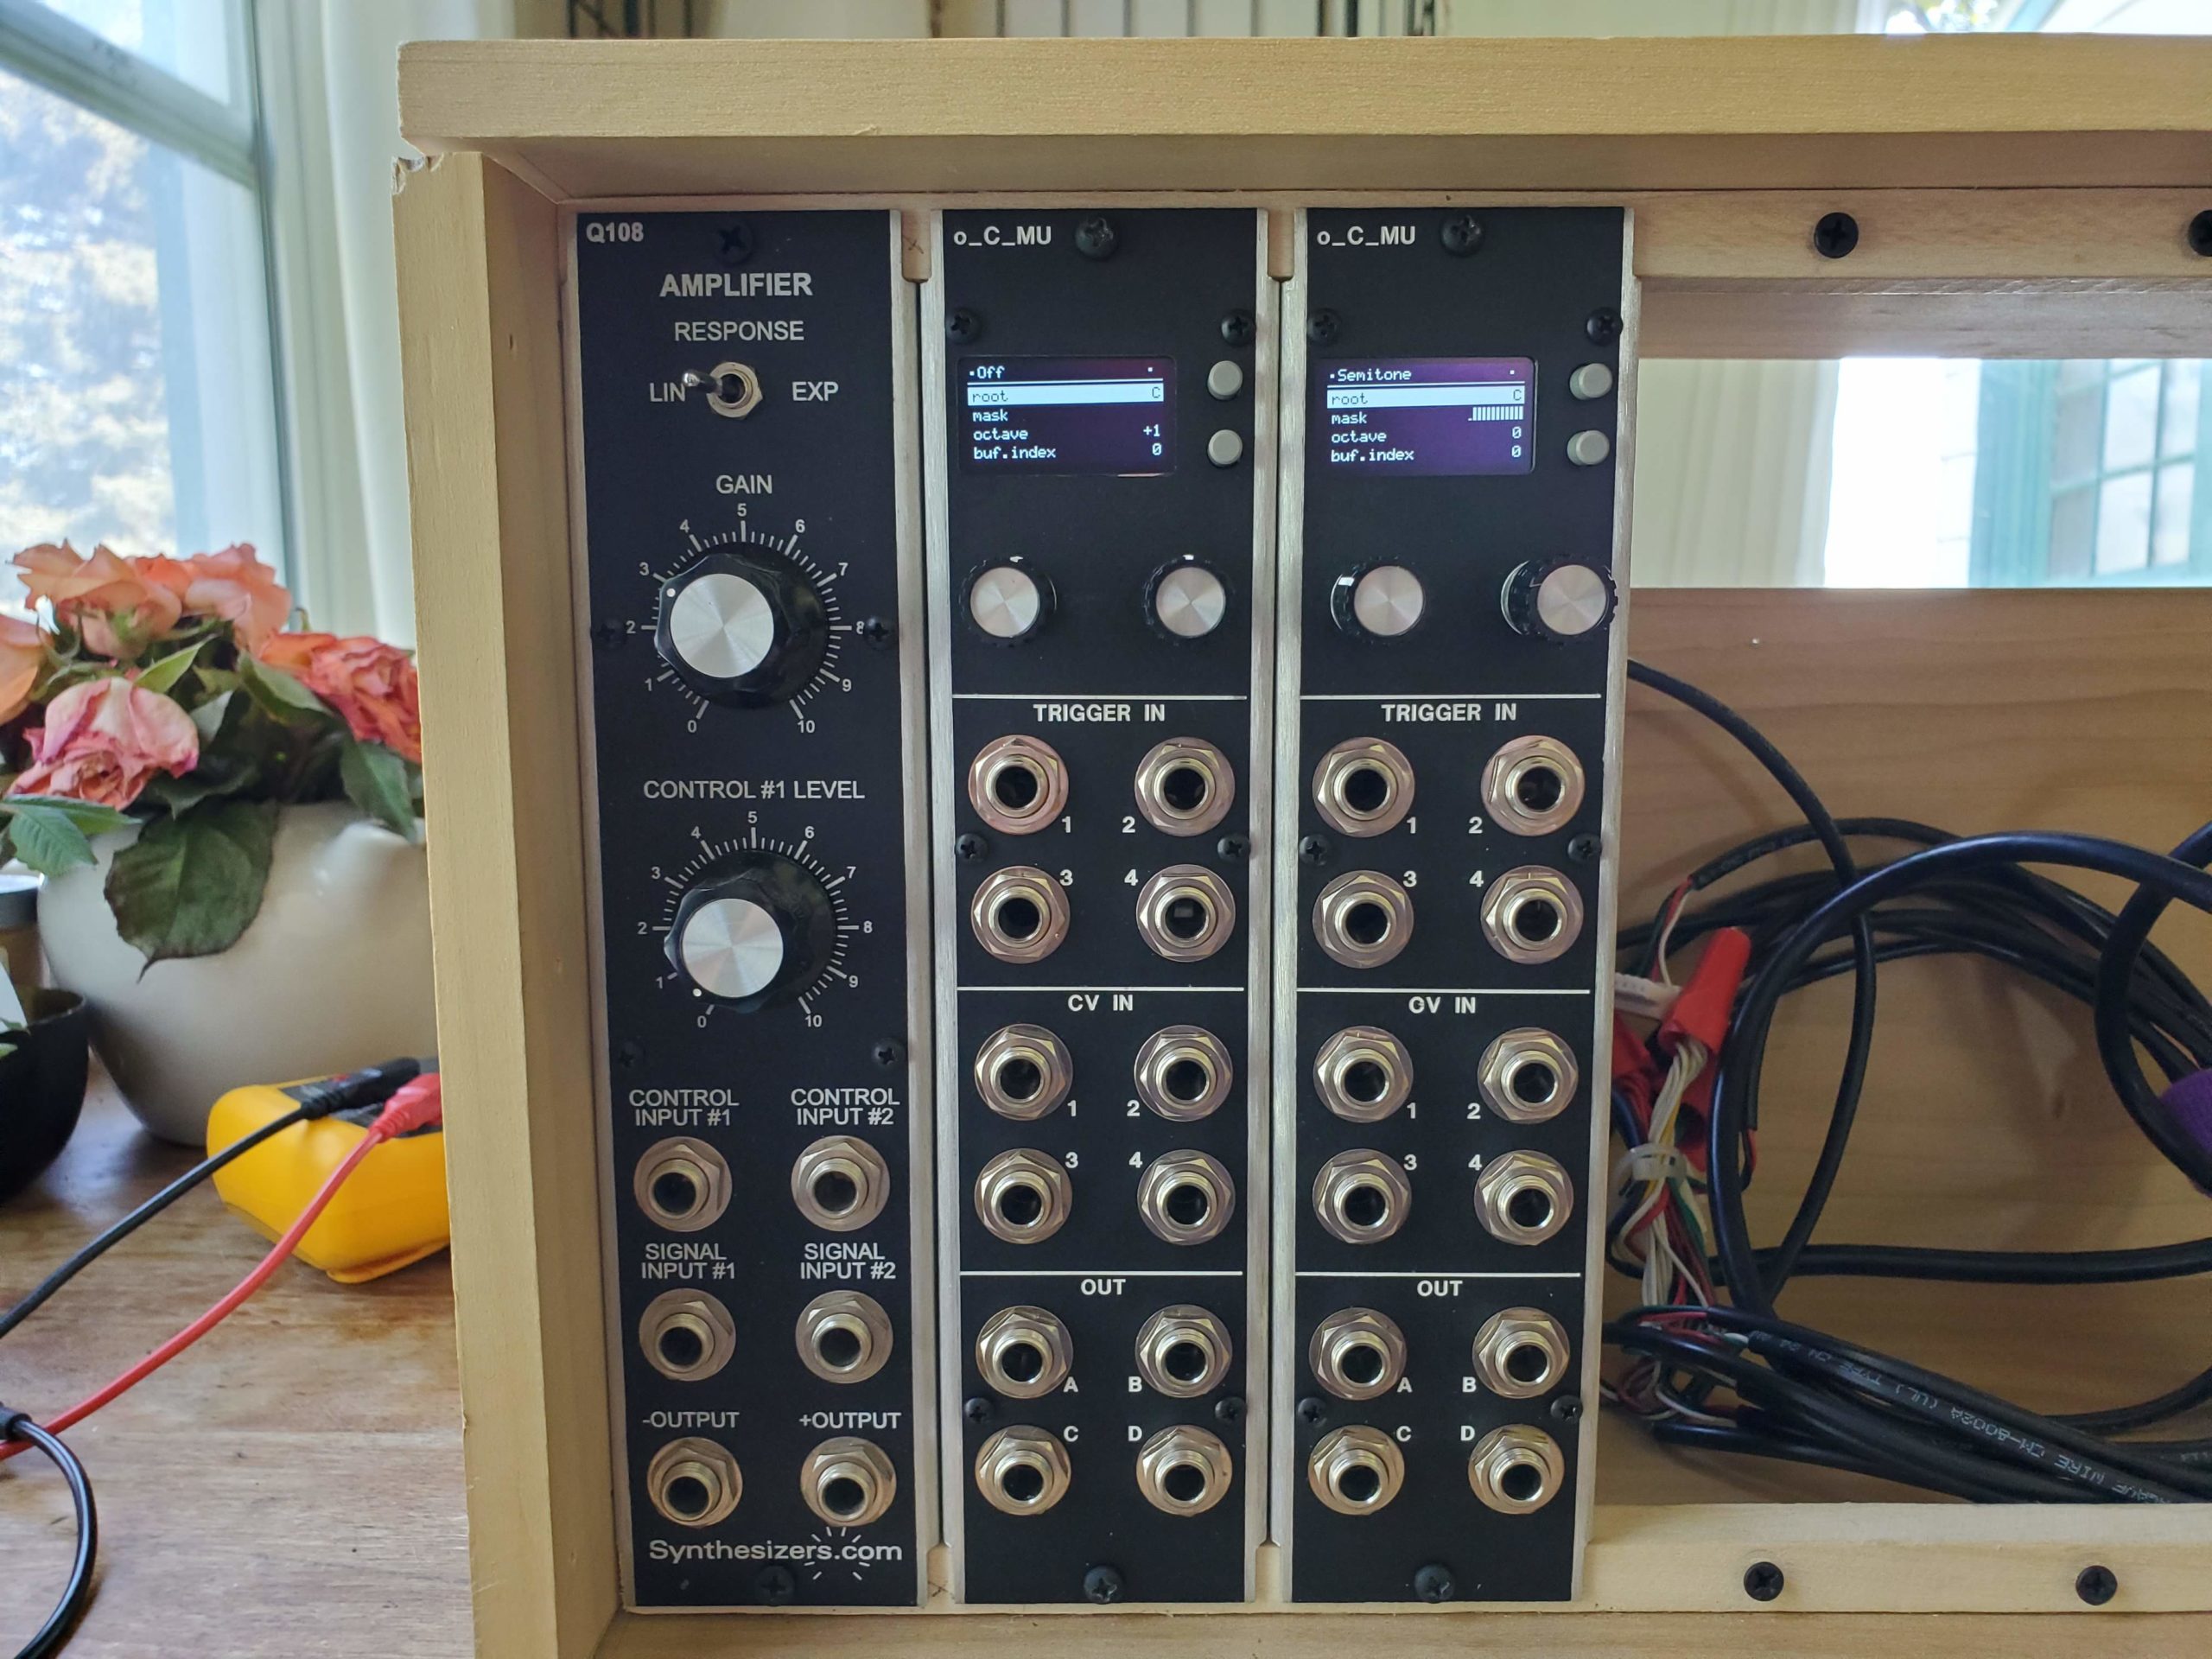
My next big project was building the Ornament and Crime module. Originally designed for the Eurorack format, I had happened upon a guy named Jason Fry making them in 5U who runs a company called FreeStateFX. The module is open source, so his approach was to publish his modifications as PCBs and schematics on github. This design interfaces well with 5U/MU format synths and uses through hole parts where possible. I was able to use his Gerber files and have PCBs printed at Oshpark. I ordered Dotcom panels and sent them in to Front Panel Express to drill/cut/print the panels. I ended up deciding it made sense to make 3 of them, one for my good friend Adam Diller in hopes that the quantizing features would help him do analog modular stuff with non-standard tunings – something I know he’s wanted to do for awhile. I made two for myself, one to run the original mxmxmx firmware and one to run the Hemisphere suite – which is amazing as a midi interfaces that goes both ways (thanks again Mads for hipping me to that in your posts). The biggest challenges for me with this build was the SMD soldering. Surface Mount soldering is ridiculous, especially with multi-legged ICs. I had to troubleshoot each module and in every instance it had to do with the SMD parts. I destroyed one $14 DAC, replaced it, but realized a solder pad came off in desoldering it. I replaced it with another DAC, running a wire from that leg, but then the leg broke off! So in the end I dug into the casing of the DAC, exposed enough metal in that area to solder a wire and ran that to its point on the Teensy 3.2. It worked but it was a big hack and probably requires a gentle touch – good luck Adam lol. The process of building this module was super informative, as it involved the Teensy microcontroller, DACs, OP amps, SMD, encoders, screens, experience with Gerber files and getting PCBs made at places like Oshpark. Doing three of them, each was 3 PCBS, gave me lots of experience with fitment and analyzing schematics.

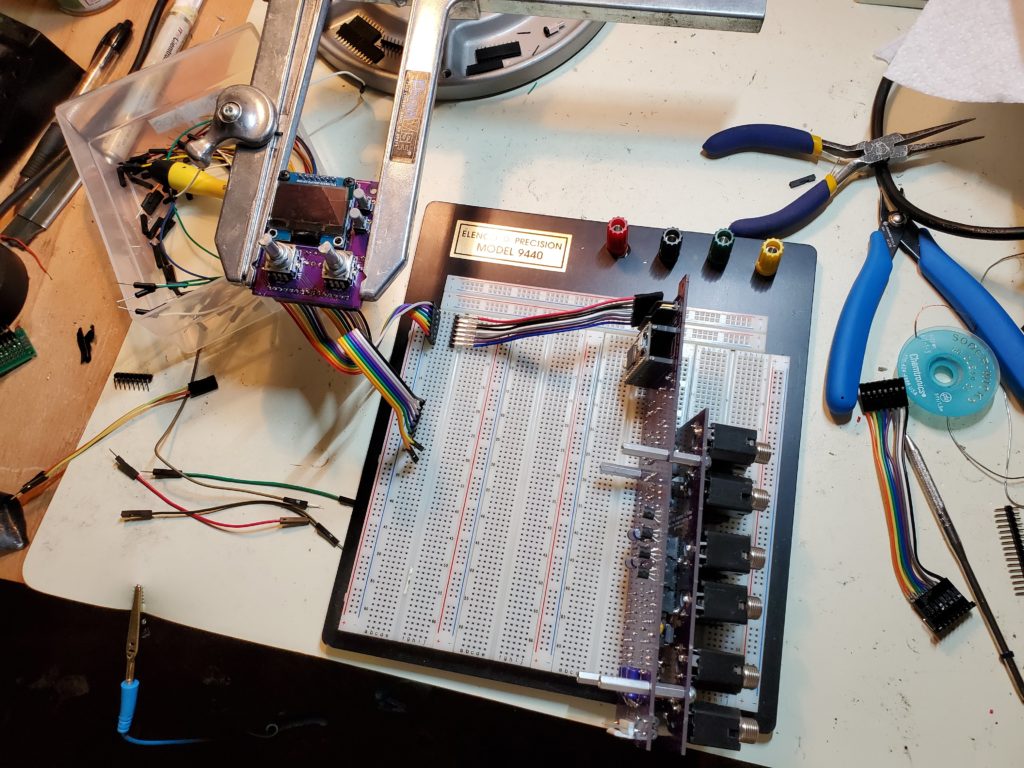
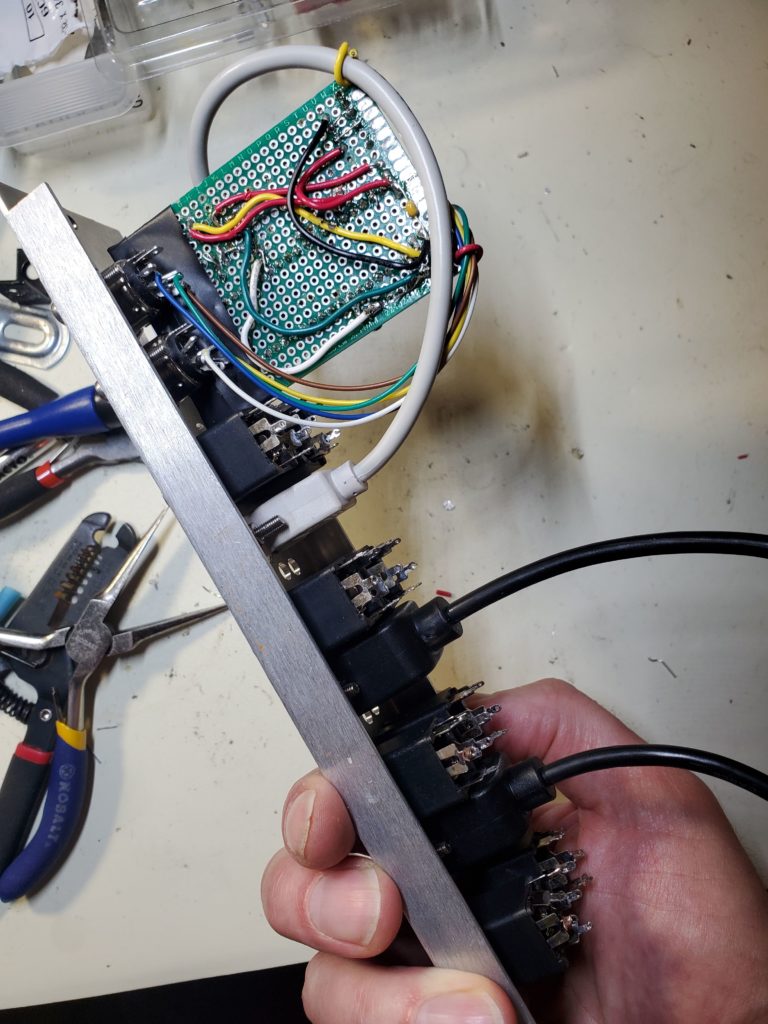
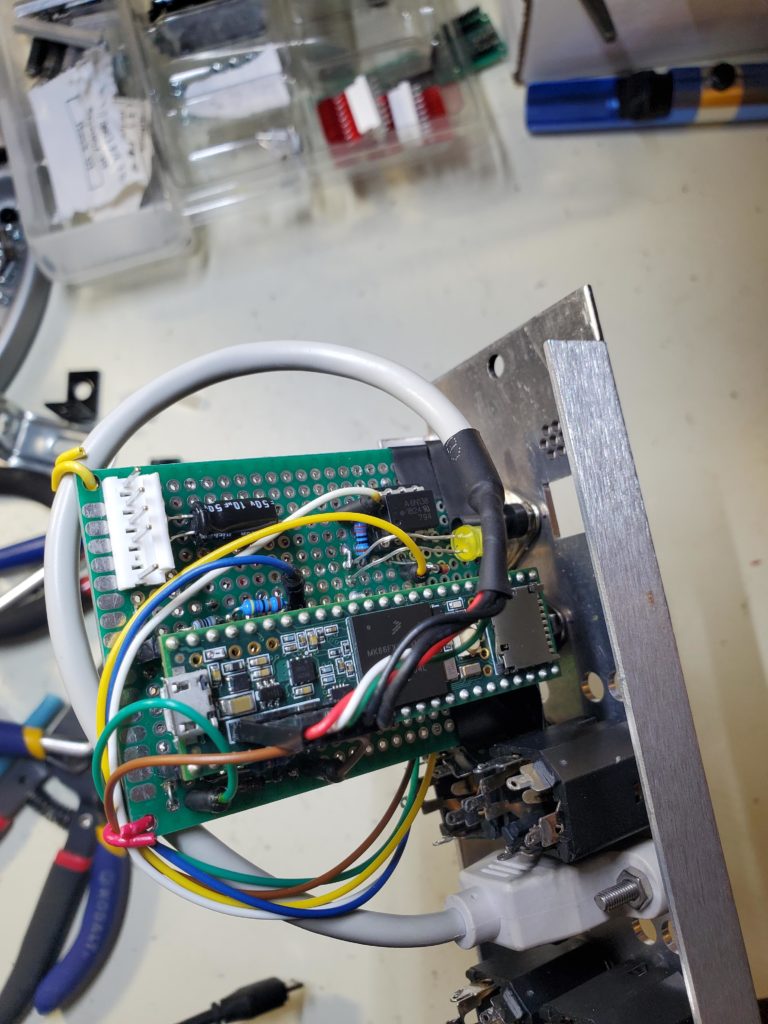
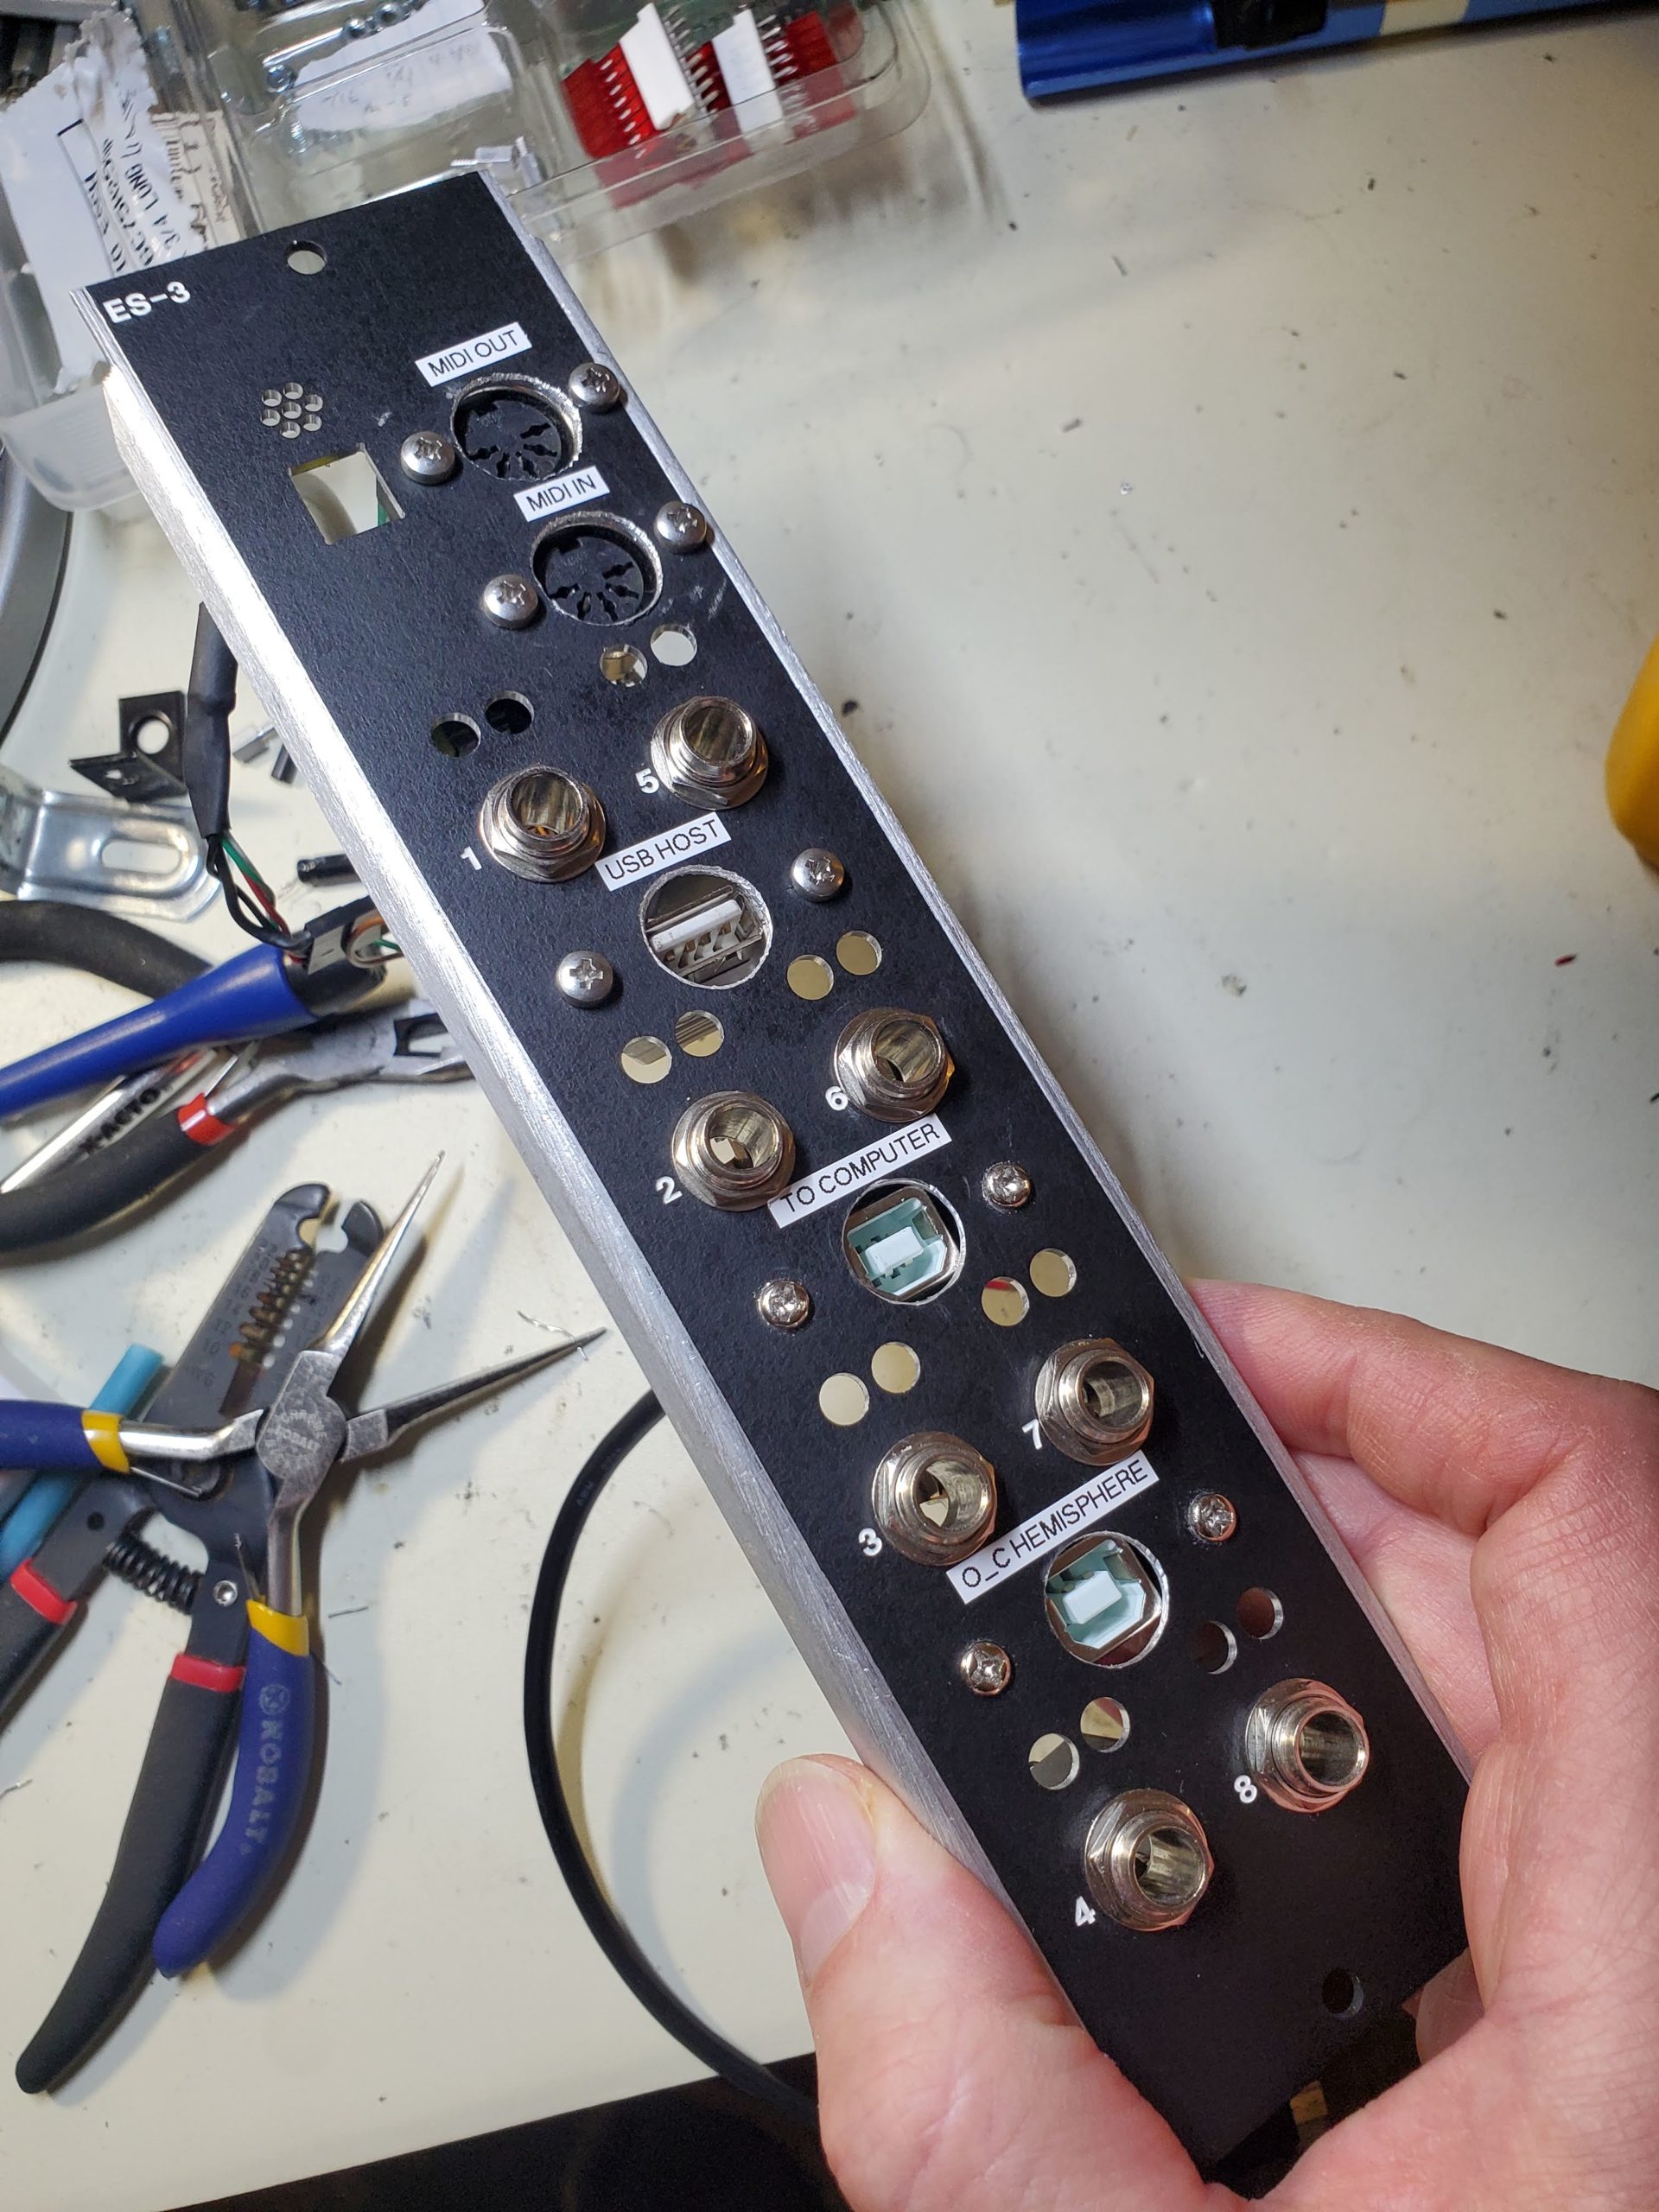
MIDI Host / O_C IO module
After finishing the O_C modules I made a module with a panel I made a few years back that didn’t work out (5U/MU reface of the Expert Sleepers ES3). I needed it to serve as a MIDI host, to allow USB controllers to plug in directly or enable the Hemisphere suite to send/receive MIDI and be able to send/receive it to the computer and/or MIDI din connectors. At the moment I’m using the jacks as mults, but I may add additional CV/MIDI in the future. This was one was my own design, I wanted a way to really utilize the Hemisphere O_C without a computer. I had built the Deft Audio MIDI interface, but really something within the modular so I don’t have to bring an external MIDI interface. I can generate 4 channels of MIDI with CV, while converting MIDI to CV to send to the modular, and it will power a USB hub to expand the incoming outgoing MIDI. The most interesting stuff I’ve done so far is have CV generate MIDI to send to my computer to play NI Kontakt instruments. But its also been useful to make the O_C module an even better tool for improvisation.
MFOS Dual AR Generator
I remember using a Buchla module at Evergreen that I really liked that had 4 AR generators, or at least that’s how I usually used it. Buchla calls it the Quad Function Generator Model 281, Evergreen had the 200 series module. The MFOS board seems very similar, at least to how I used it, only more playable due to the switches. This build was super easy, but I made the mistake of using an aluminum panel that was too thin. Use at least a 2mm thick aluminum panel or you’ll get the bendies when you patch. I’m going to repanel for my 5U/MU DOTCOM, but probably not do it ‘professionally’ by sending it to Front Panel Express and instead just drill and use labels. Not sure the cost is worth it… a blank panel is $20 + $10 shipping, FPE will charge at around $50 to use that panel + shipping both ways makes it about $100. I can handle $30.
Dirtywave M8 Tracker
I am excited about this thing, but I’ve barely touched it since receiving it. I had it in mind when I ordered it last spring that I’d be programming new Spare Death Icon tracks in the hammock last summer. But the pandemic chip manufacturing slowdowns delayed this preorder until October. And it turns out that wouldn’t have worked anyways because our skies were filled with smoke for July and August 🙁 I’m hoping to get deep on this this Winter. It’s an amazing build, has a ton going on and runs on a Teensy 4.0. I think its gonna be the key to my MIDI sequencing setup.
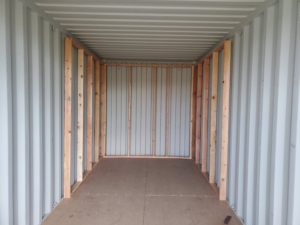
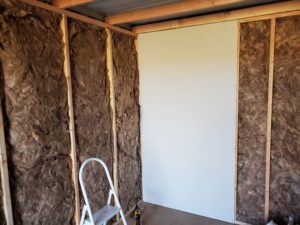
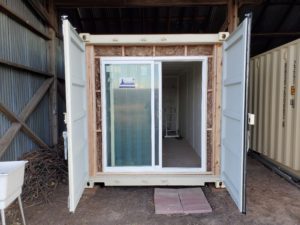
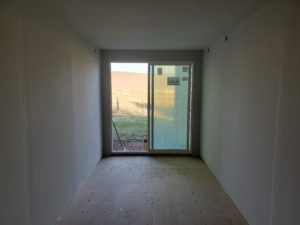
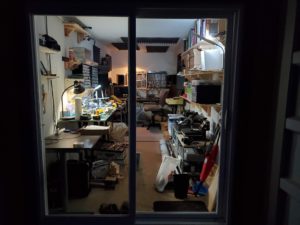
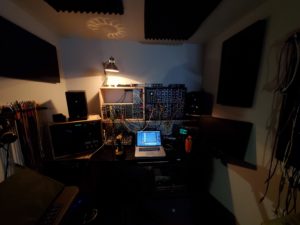
New Studio
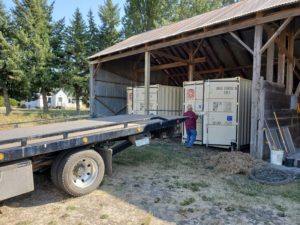
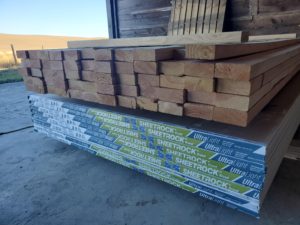
Last update: I built a new studio in a shipping container. My partner and I cleared out our shared studio space so that our son now has his own room. To do that required that we had some other setup. She tracked down a place in the area where we could lease shipping containers from and we got two of them. They dropped them off and backed them into an unused portion of our massive cattle shed. To make that happen we had to remove fencing, but it felt important because it adds a layer of protection from the elements/rain/wind. I then ordered a bunch of lumber, drywall, insulation and a sliding glass door and built out a full on studio just in time for cold season. Sound was key and after doing some research for an inexpensive option, it turned out regular 2×4 stud, insulation and drywall is the best bet. I also added foam and felt on all the surfaces touching metal, to be sure I could prevent surfaces from resonating or rattling. Its working! I’ve also added scrap carpet and foam to absorb the shorter reflections drywall will give you. It sounds good. It’s the best workspace I’ve had actually, and provides me with a work from home office desk, a graphics/design desk, an electronics bench, and my studio. Having all of that in one place is going to be amazing.


FUTURE…
My next post will likely include updates on making my own Supercollider instrument and building a Serge and hopefully updates on how the M8 is working out!